首页 > Spring MVC
Spring MVC实现RESTful
在 Spring MVC 中,我们可以通过 @RequestMapping +@PathVariable 注解的方式,来实现 RESTful 风格的请求。
注意:value 属性中占位符的位置应当与请求 URL 中参数的位置保持一致,否则会出现传错参数的情况。
HiddenHttpMethodFilter 处理 PUT 和 DELETE 请求时,必须满足以下 2 个条件:
在满足了以上条件后,HiddenHttpMethodFilter 过滤器就会将当前请求的请求方式转换为请求参数 _method 的值,即请求参数 _method 的值才是最终的请求方式,因此我们需要在 POST 请求中携带一个名为 _method 的参数,参数值为 DELETE 或 PUT。
1. 新建一个名为 springmvc-restful-demo 的 Web 项目,并将 Spring MVC 相关依赖引入到该项目中,web.xml 配置内容如下。
2. 在 src 目录下(类路径下)添加一个 Spring MVC 的配置文件 springMVC.xml,配置内容如下。
3. 在 net.biancheng.c.bean 包下,创建一个名为 User 的类,代码如下。
4. 在 net.biancheng.c.bean 包下,创建一个名为 Product 的类,代码如下。
5. 在 net.biancheng.c.controller 包下,创建一个名为 LoginController 的 Controller 类,代码如下。
6. 在 net.biancheng.c.controller 包下,创建一个名为 ProductController 的 Controller 类,代码如下。
7. 在 net.biancheng.c.dao 包下,创建一个名为 UserDao 的类,代码如下。
8. 在 net.biancheng.c.dao 包下,创建一个名为 ProductDao 的类,代码如下。
9. 在 webapp 下新建一个 js 目录,并将 jquery-3.6.0.min.js 存放到该目录下。
10. 在 webapp/WEB-INF 下,新建一个 templates 目录,并在该目录下添加以下 HTML 文件。
1) 登录页:login.html 代码如下。
2) 商品列表页:product_list.html,代码如下。
3) 商品详情页:product_info.html,代码如下。
4) 新增商品页:product_add.html,代码如下。
5) 修改商品页:product_update.html,代码如下。
11. 将 springmvc-restful-demo 部署到 Tomcat 服务器中,启动服务器,并使用浏览器访问“http://localhost:8080/springmvc-restful-demo/”,结果如下图。
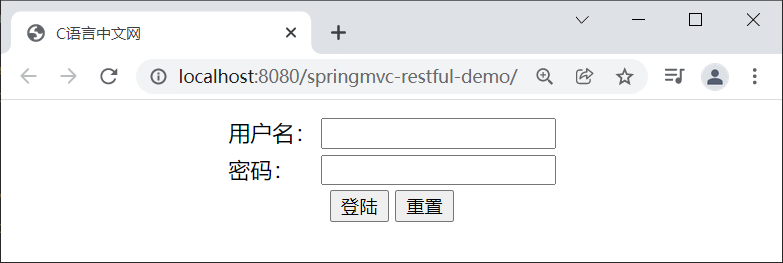
图1:登录页
12. 在登陆页分别输入用户名(admin)和密码(admin),点击登陆,结果如下图。
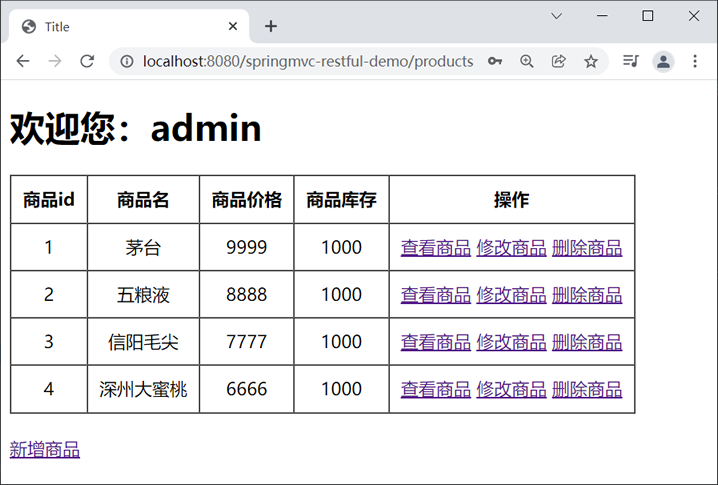
图2:商品列表页
13. 点击商品列表页下方的“新增商品”,跳转到新增商品页,并输入商品信息,结果如下图。
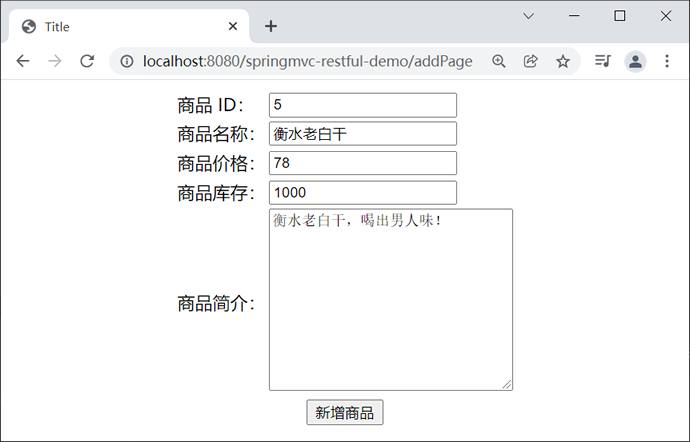
图3:新增商品
14. 点击下方的“新增商品”,结果如下图。
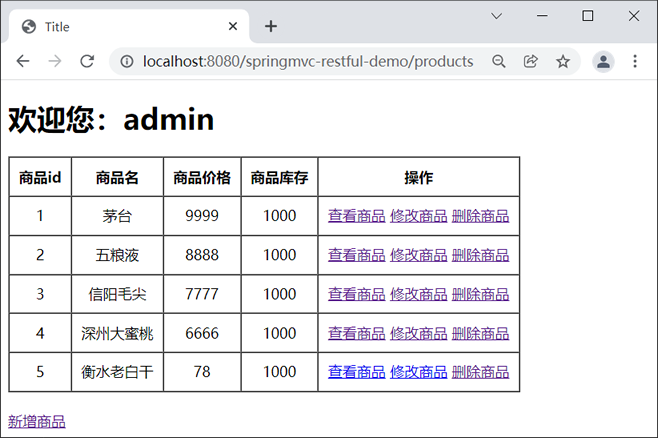
图4:商品列表页-2
15. 以“衡水老白干”为例,点击商品列表右侧的“查看商品”,结果如下图。
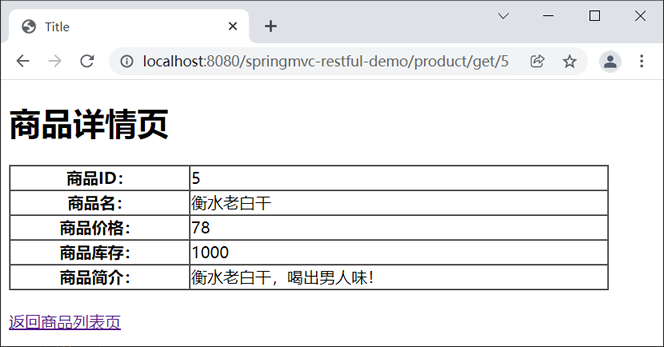
图5:商品详情页
16. 返回商品列表页,返回点击右侧的“修改商品”,结果如下图。
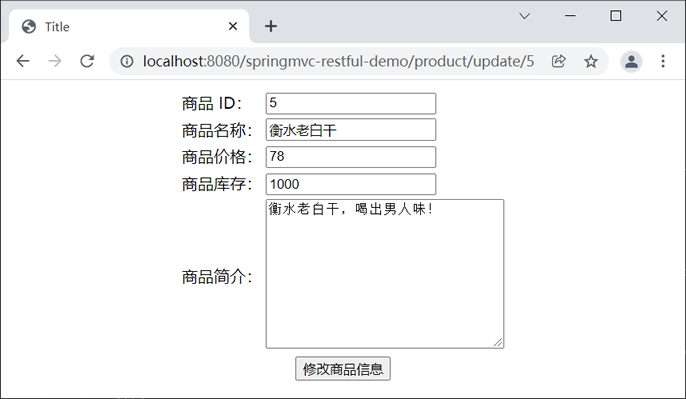
图6:商品信息回显
17. 分别修改商品的名称、价格、库存等信息,如下图。
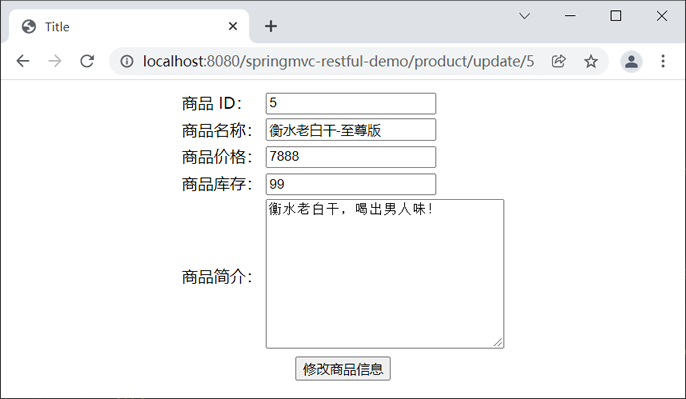
图7:修改商品信息
18. 点击下方的“修改商品信息”,返回列表页,结果如下图。

图8:商品列表页-3
19. 点击右侧的“删除商品”,删除我们新增的商品“衡水老白干-至尊版”,结果如下图。

图9:删除商品
20. 点击“确认”按钮,删除该商品,结果如下图。
图10:商品删除成功
1. 通过@RequestMapping 注解的路径设置
当请求中携带的参数是通过请求路径传递到服务器中时,我们就可以在 @RequestMapping 注解的 value 属性中通过占位符 {xxx} 来表示传递的参数,示例代码如下。
@RequestMapping("/testRest/{id}/{username}")
注意:value 属性中占位符的位置应当与请求 URL 中参数的位置保持一致,否则会出现传错参数的情况。
2. 通过 @PathVariable 注解绑定参数
我们可以在控制器方法的形参位置通过 @PathVariable 注解,将占位符 {xxx} 所表示的参数赋值给指定的形参。
@RequestMapping("/testRest/{id}/{username}")
public String testRest(@PathVariable("id") String id, @PathVariable("username")
        String username) {
    System.out.println("id:" + id + ",username:" + username);
    return "success";
}
3. 通过 HiddenHttpMethodFilter 对请求进行过滤
由于浏览器默认只支持发送 GET 和 POST 方法的请求,因此我们需要在 web.xml 中使用 Spring MVC 提供的 HiddenHttpMethodFilter 对请求进行过滤。这个过滤器可以帮助我们将 POST 请求转换为 PUT 或 DELETE 请求,其具体配置内容如下。
<!--来处理 PUT 和 DELETE 请求的过滤器-->
<filter>
    <filter-name>HiddenHttpMethodFilter</filter-name>
    <filter-class>org.springframework.web.filter.HiddenHttpMethodFilter</filter-class>
</filter>
<filter-mapping>
    <filter-name>HiddenHttpMethodFilter</filter-name>
    <url-pattern>/*</url-pattern>
</filter-mapping>
HiddenHttpMethodFilter 处理 PUT 和 DELETE 请求时,必须满足以下 2 个条件:
- 当前请求的请求方式必须为 POST;
- 当前请求必须传输请求参数 _method。
在满足了以上条件后,HiddenHttpMethodFilter 过滤器就会将当前请求的请求方式转换为请求参数 _method 的值,即请求参数 _method 的值才是最终的请求方式,因此我们需要在 POST 请求中携带一个名为 _method 的参数,参数值为 DELETE 或 PUT。
注意:若 web.xml 中同时存在 CharacterEncodingFilter 和 HiddenHttpMethodFilter 两个过滤器,必须先注册 CharacterEncodingFilter,再注册 HiddenHttpMethodFilter。
RESTFul 实例演示
下面我们就通过一个实例,来演示下如何通过 RESTFul 风格进行 Spring MVC 项目开发。1. 新建一个名为 springmvc-restful-demo 的 Web 项目,并将 Spring MVC 相关依赖引入到该项目中,web.xml 配置内容如下。
<?xml version="1.0" encoding="UTF-8"?>
<web-app xmlns="http://xmlns.jcp.org/xml/ns/javaee"
         xmlns:xsi="http://www.w3.org/2001/XMLSchema-instance"
         xsi:schemaLocation="http://xmlns.jcp.org/xml/ns/javaee http://xmlns.jcp.org/xml/ns/javaee/web-app_4_0.xsd"
         version="4.0">

    <!--请求和响应的字符串过滤器-->
    <filter>
        <filter-name>CharacterEncodingFilter</filter-name>
        <filter-class>org.springframework.web.filter.CharacterEncodingFilter</filter-class>
        <init-param>
            <param-name>encoding</param-name>
            <param-value>UTF-8</param-value>
        </init-param>
        <init-param>
            <param-name>forceResponseEncoding</param-name>
            <param-value>true</param-value>
        </init-param>
    </filter>
    <filter-mapping>
        <filter-name>CharacterEncodingFilter</filter-name>
        <url-pattern>/*</url-pattern>
    </filter-mapping>

    <!--来处理 PUT 和 DELETE 请求的过滤器-->
    <filter>
        <filter-name>HiddenHttpMethodFilter</filter-name>
        <filter-class>org.springframework.web.filter.HiddenHttpMethodFilter</filter-class>
    </filter>
    <filter-mapping>
        <filter-name>HiddenHttpMethodFilter</filter-name>
        <url-pattern>/*</url-pattern>
    </filter-mapping>

    <!-- 配置SpringMVC的前端控制器,对浏览器发送的请求统一进行处理 -->
    <servlet>
        <servlet-name>dispatcherServlet</servlet-name>
        <servlet-class>org.springframework.web.servlet.DispatcherServlet</servlet-class>
        <!--配置 DispatcherServlet 的一个初始化参数:spring mvc 配置文件按的位置和名称-->
        <init-param>
            <param-name>contextConfigLocation</param-name>
            <param-value>classpath:springMVC.xml</param-value>
        </init-param>

        <!--作为框架的核心组件,在启动过程中有大量的初始化操作要做
            而这些操作放在第一次请求时才执行会严重影响访问速度
            因此需要通过此标签将启动控制DispatcherServlet的初始化时间提前到服务器启动时-->
        <load-on-startup>1</load-on-startup>
    </servlet>

    <servlet-mapping>
        <servlet-name>dispatcherServlet</servlet-name>
        <!--设置springMVC的核心控制器所能处理的请求的请求路径
        /所匹配的请求可以是/login或.html或.js或.css方式的请求路径
        但是/不能匹配.jsp请求路径的请求-->
        <url-pattern>/</url-pattern>
    </servlet-mapping>
</web-app>
2. 在 src 目录下(类路径下)添加一个 Spring MVC 的配置文件 springMVC.xml,配置内容如下。
<?xml version="1.0" encoding="UTF-8"?>
<beans xmlns="http://www.springframework.org/schema/beans"
       xmlns:xsi="http://www.w3.org/2001/XMLSchema-instance"
       xmlns:context="http://www.springframework.org/schema/context"
       xmlns:mvc="http://www.springframework.org/schema/mvc"
       xsi:schemaLocation="http://www.springframework.org/schema/beans
       http://www.springframework.org/schema/beans/spring-beans.xsd
       http://www.springframework.org/schema/context
       https://www.springframework.org/schema/context/spring-context.xsd http://www.springframework.org/schema/mvc https://www.springframework.org/schema/mvc/spring-mvc.xsd">

    <!--开启组件扫描-->
    <context:component-scan base-package="net.biancheng.c"></context:component-scan>

    <!-- 配置 Thymeleaf 视图解析器 -->
    <bean id="viewResolver"
          class="org.thymeleaf.spring5.view.ThymeleafViewResolver">
        <property name="order" value="1"/>
        <property name="characterEncoding" value="UTF-8"/>
        <property name="templateEngine">
            <bean class="org.thymeleaf.spring5.SpringTemplateEngine">
                <property name="templateResolver">
                    <bean class="org.thymeleaf.spring5.templateresolver.SpringResourceTemplateResolver">
                        <!-- 视图前缀 -->
                        <property name="prefix" value="/WEB-INF/templates/"/>
                        <!-- 视图后缀 -->
                        <property name="suffix" value=".html"/>
                        <property name="templateMode" value="HTML5"/>
                        <property name="characterEncoding" value="UTF-8"/>
                    </bean>
                </property>
            </bean>
        </property>
    </bean>

    <!--    view-name:设置请求地址所对应的视图名称-->
    <mvc:view-controller path="/" view-name="login"></mvc:view-controller>

    <mvc:view-controller path="/addPage" view-name="product_add"></mvc:view-controller>

    <!--当SpringMVC中设置任何一个view-controller时,其他控制器中的请求映射将全部失效,此时需要在SpringMVC的核心配置文件中设置开启mvc注解驱动的标签:-->
    <mvc:annotation-driven></mvc:annotation-driven>
    <!--
    处理静态资源,例如html、js、css、jpg
    若只设置该标签,则只能访问静态资源,其他请求则无法访问
    此时必须设置<mvc:annotation-driven/>解决问题
    -->
    <mvc:default-servlet-handler/>
</beans>
3. 在 net.biancheng.c.bean 包下,创建一个名为 User 的类,代码如下。
package net.biancheng.c.bean;

public class User {
    private String userId;
    private String userName;
    private String password;

    public String getUserId() {
        return userId;
    }

    public void setUserId(String userId) {
        this.userId = userId;
    }

    public String getUserName() {
        return userName;
    }

    public void setUserName(String userName) {
        this.userName = userName;
    }

    public String getPassword() {
        return password;
    }

    public void setPassword(String password) {
        this.password = password;
    }

    @Override
    public String toString() {
        return "User{" +
                "userId=" + userId +
                ", userName='" + userName + '\'' +
                ", password='" + password + '\'' +
                '}';
    }
}
4. 在 net.biancheng.c.bean 包下,创建一个名为 Product 的类,代码如下。
package net.biancheng.c.bean;

import java.math.BigDecimal;

public class Product {
    private String productId;
    private String productName;
    private BigDecimal price;
    private Integer stock;
    private String introduction;

    public String getIntroduction() {
        return introduction;
    }

    public void setIntroduction(String introduction) {
        this.introduction = introduction;
    }

    public String getProductId() {
        return productId;
    }

    public void setProductId(String productId) {
        this.productId = productId;
    }

    public String getProductName() {
        return productName;
    }

    public void setProductName(String productName) {
        this.productName = productName;
    }

    public BigDecimal getPrice() {
        return price;
    }

    public void setPrice(BigDecimal price) {
        this.price = price;
    }

    public Integer getStock() {
        return stock;
    }

    public void setStock(Integer stock) {
        this.stock = stock;
    }

    @Override
    public String toString() {
        return "Product{" +
                "productId=" + productId +
                ", productName='" + productName + '\'' +
                ", price=" + price +
                ", stock=" + stock +
                ", introduction='" + introduction + '\'' +
                '}';
    }
}
5. 在 net.biancheng.c.controller 包下,创建一个名为 LoginController 的 Controller 类,代码如下。
package net.biancheng.c.controller;

import net.biancheng.c.bean.User;
import net.biancheng.c.dao.UserDao;
import org.springframework.beans.factory.annotation.Autowired;
import org.springframework.stereotype.Controller;
import org.springframework.web.bind.annotation.RequestMapping;

import javax.servlet.http.HttpServletRequest;
import javax.servlet.http.HttpSession;

/**
* @author C语言中文网
*/
@Controller
public class LoginController {
    @Autowired
    private UserDao userDao;

    /**
     * 登录
     * @param user
     * @param request
     * @return
     */
    @RequestMapping("/login")
    public String login(User user, HttpServletRequest request) {
        User loginUser = userDao.getUserByUserName(user.getUserName());
        if (loginUser != null && loginUser.getPassword().equals(user.getPassword())) {
            HttpSession session = request.getSession();
            //将用户信息放到 session 域中
            session.setAttribute("loginUser", loginUser);
            //重定向到商品列表
            return "redirect:/products";
        }
        request.setAttribute("msg", "账号或密码错误");
        return "login";
    }
}
6. 在 net.biancheng.c.controller 包下,创建一个名为 ProductController 的 Controller 类,代码如下。
package net.biancheng.c.controller;

import net.biancheng.c.bean.Product;
import net.biancheng.c.dao.ProductDao;
import org.springframework.stereotype.Controller;
import org.springframework.ui.Model;
import org.springframework.web.bind.annotation.PathVariable;
import org.springframework.web.bind.annotation.RequestMapping;
import org.springframework.web.bind.annotation.RequestMethod;

import javax.annotation.Resource;
import java.util.List;

/**
* @author C语言中文网
*/
@Controller
public class ProductController {

    @Resource
    private ProductDao productDao;

    /**
     * 获取商品列表
     * @param model
     * @return
     */
    @RequestMapping("/products")
    public String getProductList(Model model) {
        List productList = productDao.getProductList();
        model.addAttribute("productList", productList);
        return "product_list";
    }

    /**
     * 查看或回显商品信息,get:查看商品信息  update:为修改页回显的商品信息
     * @param action
     * @param productId
     * @param model
     * @return
     */
    @RequestMapping("/product/{action}/{productId}")
    public String getProductList(@PathVariable("action") String action, @PathVariable("productId") String productId, Model model) {
        Product product = productDao.getProductById(productId);
        model.addAttribute("product", product);
        //根据参数 action 判断跳转到商品详细信息页还是商品修改页
        if (action.equals("get")) {
            return "product_info";
        } else {
            return "product_update";
        }
    }

    /**
     * 新增商品
     * @param product
     * @return
     */
    @RequestMapping(value = "/product", method = RequestMethod.POST)
    public String addProduct(Product product) {
        productDao.addProduct(product);
        return "redirect:/products";
    }

    /**
     * 修改商品信息
     * @param product
     * @return
     */
    @RequestMapping(value = "/product", method = RequestMethod.PUT)
    public String updateProduct(Product product) {
        productDao.updateProduct(product);
        return "redirect:/products";
    }

    /**
     * 删除商品
     * @param productId
     * @return
     */
    @RequestMapping(value = "/product", method = RequestMethod.DELETE)
    public String deleteProduct(String productId) {
        productDao.deleteProduct(productId);
        return "redirect:/products";
    }
}
7. 在 net.biancheng.c.dao 包下,创建一个名为 UserDao 的类,代码如下。
package net.biancheng.c.dao;

import net.biancheng.c.bean.User;
import org.springframework.stereotype.Repository;

import java.util.*;

@Repository
public class UserDao {
    private static Map<String, User> users = null;

    static {
        users = new HashMap<String, User>();

        User user = new User();
        user.setUserId("1001");
        user.setUserName("Java用户");
        user.setPassword("987654321");

        User user2 = new User();
        user2.setUserId("1002");
        user2.setUserName("admin");
        user2.setPassword("admin");

        users.put(user.getUserName(), user);
        users.put(user2.getUserName(), user2);
    }


    /**
     * 根据用户名获取用户信息
     *
     * @param userName
     * @return
     */
    public User getUserByUserName(String userName) {
        User user = users.get(userName);
        return user;
    }
}
8. 在 net.biancheng.c.dao 包下,创建一个名为 ProductDao 的类,代码如下。
package net.biancheng.c.dao;

import net.biancheng.c.bean.Product;
import org.springframework.stereotype.Repository;

import java.math.BigDecimal;
import java.util.*;

@Repository
public class ProductDao {

    private static Map<String, Product> products = null;

    static {
        products = new HashMap<String, Product>();
        Product product = new Product();
        product.setProductId("1");
        product.setProductName("茅台");
        product.setPrice(new BigDecimal(9999));
        product.setStock(1000);
        product.setIntroduction("茅台酒是大曲酱香型酒的鼻祖,它具有色清透明、酱香突出、醇香馥郁、幽雅细腻、入口柔绵、清冽甘爽、酒体醇厚丰满、回味悠长的特点、人们把茅台酒独有的香味称为\"茅香\",是中国酱香型风格的典范。");

        Product product1 = new Product();
        product1.setProductId("2");
        product1.setProductName("五粮液");
        product1.setPrice(new BigDecimal(8888));
        product1.setStock(1000);
        product1.setIntroduction("五粮液,四川省宜宾市特产,中国国家地理标志产品。以五粮液为代表的中国白酒,有着4000多年的酿造历史,堪称世界最古老、最具神秘特色的食品制造产业之一。");

        Product product2 = new Product();
        product2.setProductId("3");
        product2.setProductName("信阳毛尖");
        product2.setPrice(new BigDecimal(7777));
        product2.setStock(1000);
        product2.setIntroduction("信阳毛尖又称豫毛峰,属绿茶类,是中国十大名茶之一,也是河南省著名特产之一;其主要产地在信阳市浉河区(原信阳市)、平桥区(原信阳县)和罗山县。");

        Product product3 = new Product();
        product3.setProductId("4");
        product3.setProductName("深州大蜜桃");
        product3.setPrice(new BigDecimal(6666));
        product3.setStock(1000);
        product3.setIntroduction("深州蜜桃,河北省深州市特产,中国国家地理标志产品。深州蜜桃个头硕大,果型秀美,色鲜艳,皮薄肉细,汁甜如蜜。2014年10月8日,国家质检总局正式批准“深州蜜桃”为原产地域保护产品(即地理标志保护产品)。");

        products.put(product.getProductId(), product);
        products.put(product1.getProductId(), product1);
        products.put(product2.getProductId(), product2);
        products.put(product3.getProductId(), product3);
    }

    /**
     * 获取商品列表
     *
     * @return
     */
    public List getProductList() {
        List productList = new ArrayList();
        Set<String> keys = products.keySet();
        for (String key : keys) {
            Product product = products.get(key);
            productList.add(product);
        }
        return productList;
    }

    /**
     * 根据商品 id 获取商品信息
     *
     * @param productId
     * @return
     */
    public Product getProductById(String productId) {
        return products.get(productId);
    }

    /**
     * 新增商品
     *
     * @param product
     */
    public void addProduct(Product product) {
        products.put(product.getProductId(), product);
    }

    /**
     * 修改商品
     *
     * @param product
     */
    public void updateProduct(Product product) {
        products.put(product.getProductId(), product);

    }

    /**
     * 删除商品
     *
     * @param productId
     */
    public void deleteProduct(String productId) {
        products.remove(productId);
    }
}
9. 在 webapp 下新建一个 js 目录,并将 jquery-3.6.0.min.js 存放到该目录下。
10. 在 webapp/WEB-INF 下,新建一个 templates 目录,并在该目录下添加以下 HTML 文件。
1) 登录页:login.html 代码如下。
<!DOCTYPE html>
<html lang="en" xmlns:th="http://www.thymeleaf.org">
<head>
    <meta charset="UTF-8">
    <title>C语言中文网</title>
</head>
<body>
<form th:action="@{/login}" method="post">

    <table style="margin: auto">
        <tr>
            <td th:if="${not #strings.isEmpty(msg)}" colspan="2" align="center">
                <p style="color: red;margin: auto" th:text="${msg}"></p>
            </td>
        </tr>
        <tr>
            <td>用户名:</td>
            <td><input type="text" name="userName" required><br></td>
        </tr>
        <tr>
            <td>密码:</td>
            <td><input type="password" name="password" required><br></td>
        </tr>
        <tr>
            <td colspan="2" align="center">
                <input type="submit" value="登陆">
                <input type="reset" value="重置">
            </td>

        </tr>
    </table>
</form>
</body>
</html>
2) 商品列表页:product_list.html,代码如下。
<!DOCTYPE html>
<html lang="en" xmlns:th="http://www.thymeleaf.org">
<head>
    <meta charset="UTF-8">
    <title>Title</title>

    <script type="text/javaScript"
            src="../../js/jquery-3.6.0.min.js " th:src="@{/js/jquery-3.6.0.min.js}"></script>
</head>
<body>

<h1 th:text="'欢迎您:'+${session.loginUser.getUserName()}" th:if="${not #strings.isEmpty(session.loginUser)}"></h1>
<table th:border="1" th:cellspacing="0" th:cellpadding="10" style="text-align: center;">
    <thead>
    <th>商品id</th>
    <th>商品名</th>
    <th>商品价格</th>
    <th>商品库存</th>
    <th>操作</th>
    </thead>
    <tbody>
    <tr th:each="product:${productList}">
        <td th:text="${product.getProductId()}"></td>
        <td th:text="${product.getProductName()}"></td>
        <td th:text="${product.getPrice()}"></td>
        <td th:text="${product.getStock()}"></td>
        <td>
            <a th:href="@{|/product/get/${product.getProductId()}|}">查看商品</a>
            <a th:href="@{|/product/update/${product.getProductId()}|}">修改商品</a>
            <a href="#" th:onclick="testJson1([[${product.getProductId()}]]);">删除商品</a>
        </td>
    </tr>
    </tbody>
</table>
<br>
<a th:href="@{/addPage}">新增商品</a>

<!-- 作用:通过超链接控制表单的提交,将post请求转换为delete请求 -->
<form id="delete_form" method="post" th:action="@{/product}">
    <!-- HiddenHttpMethodFilter要求:必须传输_method请求参数,并且值为最终的请求方式 -->
    <input type="hidden" name="_method" value="delete"/>
    <input type="hidden" name="productId" th:id="form-id"/>
</form>

<script type="text/javaScript">

    function testJson1(productId) {
        var b = confirm("确认删除id 为" + productId + " 的商品?");
        if (b) {
            var delete_form = $("#delete_form");
            $("#form-id").val(productId);
            delete_form.submit();
        }
    }
</script>
</body>
</html>
3) 商品详情页:product_info.html,代码如下。
<!DOCTYPE html>
<html lang="en" xmlns:th="http://www.thymeleaf.org">
<head>
    <meta charset="UTF-8">
    <title>Title</title>
</head>
<body>
<h1>商品详情页</h1>
<table th:border="1" th:cellspacing="0" style="width: 600px">
    <tr>
        <th> 商品ID:</th>
        <td th:text="${product.getProductId()}"></td>
    </tr>
    <tr>
        <th>商品名:</th>
        <td th:text="${product.getProductName()}"></td>
    </tr>
    <tr>
        <th>商品价格:</th>
        <td th:text="${product.getPrice()}"></td>
    </tr>
    <tr>
        <th>商品库存:</th>
        <td th:text="${product.getStock()}"></td>
    </tr>
    <tr>
        <th>商品简介:</th>
        <td th:text="${product.getIntroduction()}"></td>
    </tr>
</table>
<br>
<a th:href="@{/products}">返回商品列表页</a>
</body>
</html>
4) 新增商品页:product_add.html,代码如下。
<!DOCTYPE html>
<html lang="en" xmlns:th="http://www.thymeleaf.org">
<head>
    <meta charset="UTF-8">
    <title>Title</title>
</head>
<body>
<form th:action="@{/product}" method="post">
    <table style="margin: auto">
        <tr>
            <td>商品 ID:</td>
            <td><input type="text" name="productId" required></td>
        </tr>

        <tr>
            <td>商品名称:</td>
            <td><input type="text" name="productName" required></td>
        </tr>
        <tr>
            <td>商品价格:</td>
            <td><input type="text" name="price" required></td>
        </tr>
        <tr>
            <td>商品库存:</td>
            <td><input type="text" name="stock" required></td>
        </tr>
        <tr>
            <td>商品简介:</td>
            <td><textarea name="introduction" rows="10" cols="30"></textarea><br></td>
        </tr>
        <tr>
            <td colspan="2" align="center"><input type="submit" value="新增商品"></td>
        </tr>
    </table>
</form>
</body>
</html>
5) 修改商品页:product_update.html,代码如下。
<!DOCTYPE html>
<html lang="en" xmlns:th="http://www.thymeleaf.org">
<head>
    <meta charset="UTF-8">
    <title>Title</title>
</head>
<body>

<form th:action="@{/product}" method="post">
    <input type="hidden" name="_method" value="put">
    <table style="margin: auto">
        <tr>
            <td>商品 ID:</td>
            <td><input type="text" name="productId" th:value="${product.getProductId()}" readonly></td>
        </tr>

        <tr>
            <td>商品名称:</td>
            <td><input type="text" name="productName" th:value="${product.getProductName()}" required></td>
        </tr>
        <tr>
            <td>商品价格:</td>
            <td><input type="text" name="price" th:value="${product.getPrice()}" required></td>
        </tr>
        <tr>
            <td>商品库存:</td>
            <td><input type="text" name="stock" th:value="${product.getStock()}" required></td>
        </tr>
        <tr>
            <td>商品简介:</td>
            <td><textarea name="introduction" rows="10" cols="30" th:text="${product.getIntroduction()}"></textarea>
            </td>
        </tr>
        <tr>
            <td colspan="2" align="center"><input type="submit" value="修改商品信息"></td>
        </tr>
    </table>
</form>
</body>
</html>
11. 将 springmvc-restful-demo 部署到 Tomcat 服务器中,启动服务器,并使用浏览器访问“http://localhost:8080/springmvc-restful-demo/”,结果如下图。
图1:登录页
12. 在登陆页分别输入用户名(admin)和密码(admin),点击登陆,结果如下图。
图2:商品列表页
13. 点击商品列表页下方的“新增商品”,跳转到新增商品页,并输入商品信息,结果如下图。
图3:新增商品
14. 点击下方的“新增商品”,结果如下图。
图4:商品列表页-2
15. 以“衡水老白干”为例,点击商品列表右侧的“查看商品”,结果如下图。
图5:商品详情页
16. 返回商品列表页,返回点击右侧的“修改商品”,结果如下图。
图6:商品信息回显
17. 分别修改商品的名称、价格、库存等信息,如下图。
图7:修改商品信息
18. 点击下方的“修改商品信息”,返回列表页,结果如下图。
图8:商品列表页-3
19. 点击右侧的“删除商品”,删除我们新增的商品“衡水老白干-至尊版”,结果如下图。
图9:删除商品
20. 点击“确认”按钮,删除该商品,结果如下图。
图10:商品删除成功